Skin Care
How to Use a Sunless Tanner
Sunless tanners are a great way to achieve a sun-kissed glow without exposing your skin to harmful UV rays from the sun. These products offer a safe and effective alternative to tanning beds and prolonged outdoor tanning, both of which can lead to skin damage and increase the risk of skin cancer. Understanding how sunless tanners work and knowing how to evenly apply them can help you achieve a flawless, natural-looking tan on both your face and body.
How Do Self Tanners Work
The active ingredient in most self-tanning products is dihydroxyacetone (DHA). DHA is a colorless sugar that reacts with the amino acids in the dead skin cells on the surface of your skin. This reaction produces a browning effect like the Maillard reaction that occurs when you toast bread. The result is a temporary tan that can last from a few days to a week, depending on how quickly your skin naturally exfoliates. The concentration of DHA in a product will determine the depth of the tan, with higher concentrations producing a darker color.
Tips for Applying
Prepping your skin before applying a sunless tanner is crucial for achieving an even and streak-free result. Start by exfoliating your entire body with a gentle scrub to remove dead skin cells. This ensures that the tanner is applied to a smooth, even surface. Pay extra attention to rough areas like elbows, knees, and ankles, as these spots tend to absorb more product and can appear darker if not properly exfoliated. After exfoliating, shave any areas where you usually remove hair. Shaving after applying a tanner can strip away some of the color, leading to uneven patches.
Once your skin is exfoliated and smooth, it’s important to moisturize, but do so sparingly and strategically. Apply a lightweight, oil-free moisturizer to dry areas such as your elbows, knees, ankles, and any other rough patches. This helps to create a barrier that prevents these areas from absorbing too much tanner, which can result in a more natural-looking tan. Avoid applying heavy moisturizers or oils to the rest of your body immediately before tanning, as these can interfere with the absorption of the DHA.
When it comes to applying sunless tanner, it’s best to work slowly and methodically as you apply the product. Start by choosing a well-lit area so you can see where the product is being applied. Or, you might want to add a bit of your foundation or a tinted BB cream to give the self-tanner some color and help you see where you are applying the product. Rather than apply with your fingers, use a tanning mitt or latex gloves instead. This will protect your hands from picking up any color and ensure an even application.
Begin with a small amount of product and apply it in circular motions, blending thoroughly as you go. For your body, start at your feet and work your way up, using long, even strokes. Be cautious around joints and creases, blending well to avoid buildup.
For the face, select a tanner specifically formulated for facial skin, as it is often more delicate and sensitive than the rest of your body. Apply a thin, even layer to your face, blending into your hairline, down your neck, and onto your ears to ensure a seamless transition. It’s a good idea to use a makeup sponge or a small brush for more precise application around your hairline, eyebrows and nose.
To avoid streaks or missed areas, patience is key. It might take 2-3 applications to get the desired color. Allow each layer to dry completely before applying additional layers if you desire a deeper tan. Depending on the formulation, sunless tanners generally develop over 3-6 hours. It’s best to avoid showering immediately after or sweating heavily as you wait for the color to develop. You might want to apply the product at night and wear loose, dark clothing to prevent the tanner from rubbing off onto your clothes or bed sheets.
What About that Smell?
Self-tanners have come a long way since they were first developed. They no longer dry out the skin and they don’t turn your skin neon orange as they once used to. Unfortunately, many self-tanners still give off a very distinctive odor – sort of like burnt toast or worse depending on how much you use. This smell is due to the chemical reaction between the skin and DHA, the ingredient that provides that tanned look. The good news is that you can now find brands that mask the odor with herbal scents like rosewood, linden flower and coconut. Additionally, many products on the market today contain antioxidants and hydrating ingredients like shea butter to help protect your skin’s barrier.
Maintaining Your ‘Tan’
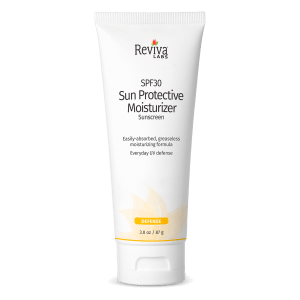
Once your tan has developed, maintain it by moisturizing daily. Hydrated skin holds a tan longer and more evenly. Avoid exfoliating too frequently, as this will cause the tan to fade more quickly. If you notice any patchiness as the tan starts to wear off, you can lightly exfoliate the area and reapply a small amount of tanner to even out the color. And while many self-tanners contain a sunscreen, it’s best to still apply a daily sunscreen for maximum protection.
Removing Your Self Tanner
Most self-tanning products will last about five to seven days with proper care. If you want to get rid of your tan sooner, simply exfoliate the product off your skin and make sure to hydrate after with a dense cream or body oil.
Sunless tanners offer a convenient and safe way to achieve a beautiful tan year-round. Whether you’re getting ready for a special event or just want a bit of extra color, mastering the art of sunless tanning can help you achieve the perfect tan without the sun.


